React Portal 实战——登陆弹窗
React Portal 实战——登陆弹窗
实现效果:
点击初始界面登录按钮,跳转到登录路径,用 Portal 创建一个登录弹窗以及灰色蒙版背景。
要求:
- 同时保证原始界面内容保留并显示在蒙版后。
- 点击退出按钮后,重定向到“个人档案”页面。
效果图: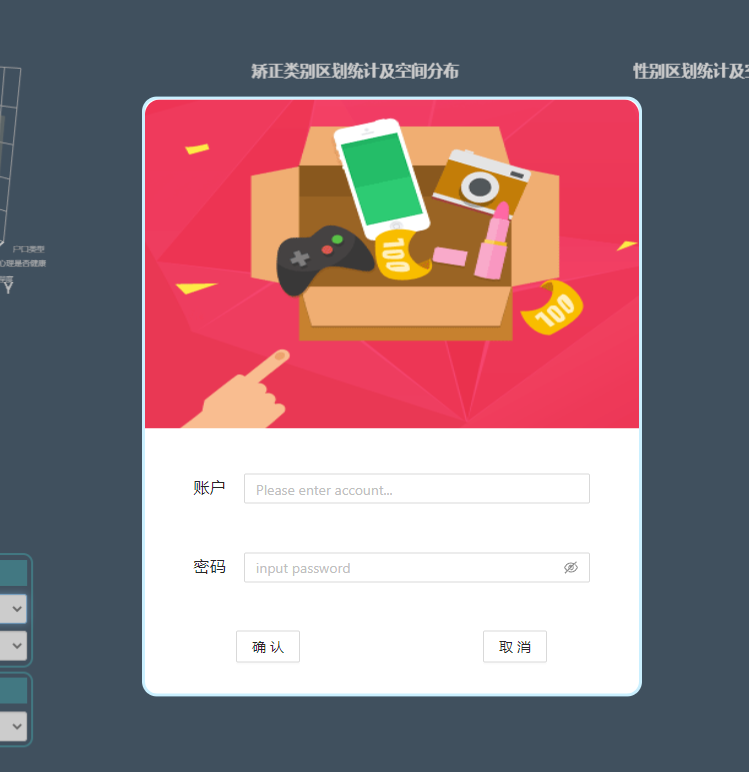
登陆界面代码
直接解读代码内容
重点:
- 使用 Portal 需要在组件开头导入
ReactDOM.createPortal()方法,即import { createPortal } from 'react-dom' - 掌握 Portal 的组织结构:创建DOM节点,添加JSX元素,在组件销毁前移除DOM节点
- React Router 重定向
1 | |
代码详解
- React v16 Portal 创建的调用方法
1
import { createPortal } from 'react-dom' - Portal 主体
constructor()构造函数中创建DOM节点
(给DOM节点添加id属性)
将DOM节点添加到<body>中
用createPortal方法创建 Portal,传入可渲染子元素以及挂载的DOM节点,并在render中返回
在componentWillUnmount中,即组件销毁(路由跳转,display:none等都算将组建销毁)前,移除该DOM节点1
2
3
4
5
6
7
8
9
10
11
12
13
14
15
16
17
18
19
20
21
22
23
24
25
26class Register extends Component {
constructor(props) {
...
//创建dom节点
const dom = window.document;
this.node = dom.createElement("div")
this.node.setAttribute("id", "account") //this.node.id = "account"
dom.body.appendChild(this.node)
}
componentWillUnmount() {
window.document.body.removeChild(this.node)
}
render() {
return createPortal(
(
<div>
...
</div>
)
, this.node
)
}
}
export default Register; - React Router 路由重定向
路由重定向可以实现路由路径的直接跳转,例如进入某一组件,在碰到重定向后自动跳转到另一组件。
路由重定向可以分为:标签式重定向 和 编程式重定向
详细参考 Router 路由文章,此处用了编程式的重定向方法this.props.history.push("url")。1
2
3
4
5
6
7
8redirect() {
// 多余步骤,跳转时其实已经执行了componentWillUnmount;
// 此处只做关于组件销毁的常用方法记录;
this.setState({
isRender: true,
})
this.props.history.push("/person/齐天大圣")
}
本博客所有文章除特别声明外,均采用 CC BY-SA 4.0 协议 ,转载请注明出处!