页面设计 项目 GitHub 地址:group_website
方法+重难点 CSS脱离文档流后同级元素上移问题 参考链接:css固定定位脱离文档流怎么解决?
1
2
3
4
5
6
7
8
9
10
11
.parent {height : 200px ;.son {position :fixed;width : 200px ;height : 200px ;
解决方法2:在合适的位置设置占位元素。没有在父元素设置元素高度直观,不建议采用。解决方法3:使用JS设置父级DIV的高度等于子DIV (推荐)
1
2
3
4
5
6
window .onload = ()=>(let son = document .getElementById('son' );let parent = document .getElementById('parent' );parent .style.height = window .getComputedStyle('son' ).height;
window.getComputedStyle() : 以对象形式返回目标的所有CSS样式值window.onload() : MDN文档中说明,onload 事件触发发生在所有 DOM 资源加载完成后,此时所有元素在DOM中均已完成挂载,不用担心 onload 事件触发后调用函数无作用对象的问题。在 React 中用 ref 属性来获取 dom 元素进行操作
1
2
3
4
5
6
7
8
9
10
11
12
13
14
15
16
17
18
19
20
21
22
23
24
25
26
//在组件完成挂载时,添加 window.onload 监听事件,它在所有 DOM 资源加载完成后调用函数执行。 componentDidMount() { window.onload = ()=>{ this.parent.style.height = window.getComputedStyle(this.son).height } } ... <div style= {{ position: "relative" }} //获取DOM元素 ref={(parent) => { this.parent = parent }} > <img style= {{ position: "absolute" , zIndex: -1, width: "100vw" , height: "1080px" }} src={headerPng} alt="" //获取DOM元素 ref={(son) => { this.son = son }} /> <Titles /> <DropdownMenu isActive ={this.state.isActive} /> </div > <div style = {{ position: "relative" }} > //去除了占位元素: - <div className ="titlePlaceHolder" > </div > <PageOne /> </div >
渲染结果:
this 指向问题 参考链接:this 指向问题 this 指向详细解析 DOM事件处理函数
setTimeout & setInterval
箭头函数中的 this 因此常被用于调用函数,改变函数的this指向,不容易出错。
举例:
1 setTimeout (() =>"close_isActive_delay" }) }, 300 )
上述例子中,不能直接使用dispatch函数,因为在setTimeout中this指向全局对象window,使用箭头函数后自动关联上下文,this最终指向监听事件的DOM元素。(正确性有待商榷,对this不是很了解)
项目结构 1 2 3 4 5 6 7 8 9 10 11 12 13 14 15 16 17 18 19 20 21 22 23 24 25 26 27 28 29 ├─ group_websiteApp .DropdownMenu .DropdownSubTitle .DropdownTitle .PageOne .PageOneText .SubTitle .Titles .DropdownMenu .DropdownTitle .PageOne .SubTitle .Titles .Website .
项目入口 js 文件为 Website.js,CSS样式存储于 /store文件夹下,页面组件存储于/components文件夹中。
下拉菜单 Website.js 1 2 3 4 5 6 7 8 9 10 11 12 13 14 15 16 17 18 19 20 21 22 23 24 25 26 27 28 29 30 31 32 33 34 35 36 37 38 39 40 41 42 43 44 45 46 47 48 49 50 51 52 53 54 import React, { Component } from 'react' ;import DropdownMenu from './components/DropdownMenu' import Titles from './components/Titles' import "./App.css" import store from './store/index' import headerPng from './images/header.png' import PageOne from './components/page1/PageOne' class Website extends Component constructor (props )super (props);this .state = store.getState()this .storeChange = this .storeChange.bind(this )this .storeChange)storeChange (this .setState(store.getState())render (return (position : "relative" }}>position :"absolute" ,zIndex :-1 ,width :"100vw" ,height :"1080px" }} src={headerPng} alt="" />this .state.isActive} />position :"relative" }}>"titlePlaceHolder" ></div>export default Website;
重难点分析 页面布局
如何让组件脱离文档流?方法一:设置position:("fixed"/"absolute"),方法二:设置display:float,不过目前常用的是 flex 布局,一般用不到 float 浮动布局。
脱离文档流的好处和坏处?好处:脱离文档流可以释放元素占据的空间,让同级以及子级元素浮动到顶部,在设置图片背景的时候常用,如实战代码中的<img style={{position:"absolute",zIndex:-1,width:"100vw",height:"1080px"}} src={headerPng} alt="" />。坏处:脱离文档流后后续的布局会被打乱,很难调整。
如何克服脱离文档流后后续元素上移问题:用<div>创建一个具有原同级元素大小的元素充当占位元素,或者给父级元素设置相应的高度。实战中代码使用如下:1 2 3 4 5 6 7 8 9 10 11 //设置position:"absolute"后脱离文档流 <div style = {{ position: "relative" }} > <img style = {{position:"absolute" ,zIndex:-1,width:"100vw",height:"1080px"}} src ={headerPng} alt ="" /> <Titles /> <DropdownMenu isActive ={this.state.isActive} /> </div > <div style = {{position:"relative" }} > //设置一个div元素,大小与上述div最大尺寸相同,占据原有位置 <div className ="titlePlaceHolder" > </div > <PageOne /> </div >
脱离文档流的元素位置设置:position:("fixed"/"absolute")属性都是相对于父级的position:"relative"进行定位的。若要进行位置定位,在父级元素单独设置position:"relative"即可。
关于 z-index 属性设置:在设置背景的时候,往往会遇到背景遮盖了优先需要显示的部分,这就需要调整 z-index 的属性,z-index 越大,显示的优先级越高。1 2 3 4 5 z-index 设置:index 的(每一个)元素必须设置position :(relative/fixed/absolute),若不对位置有调整或特殊要求,可以单设一个relative。position 。index ,排序。position
Title.js
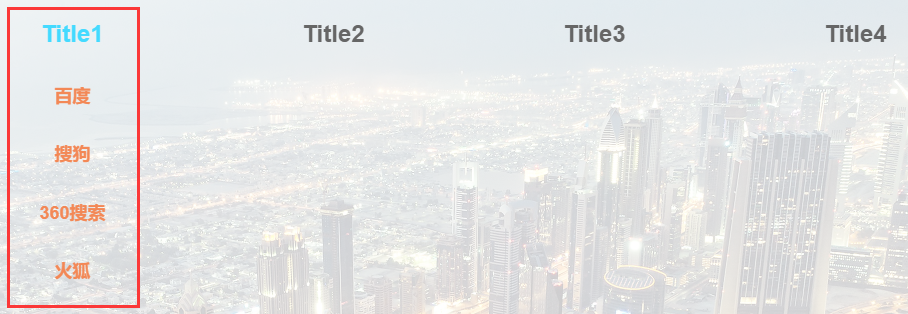
1 2 3 4 5 6 7 8 9 10 11 12 13 14 15 16 17 18 19 20 21 22 23 24 25 26 27 28 29 30 31 32 33 34 35 36 37 38 39 40 41 42 43 44 45 46 47 48 49 50 51 52 53 54 55 56 57 58 59 60 61 62 63 64 65 66 67 68 69 70 71 72 73 74 75 76 77 78 import React, { Component } from 'react' ;import "../style/Titles.css" import SubTitle from './SubTitle' ;class Titles extends Component constructor (props )super (props);this .state = {}render (const titleInfo = ["Title1" ,1 ,name : "百度" , href : "https://www.baidu.com/" , },name : "搜狗" , href : "https://www.sogou.com/" , },name : "360搜索" , href : "https://www.so.com/" , },name : "火狐" , href : "https://start.firefoxchina.cn/" , },"Title2" ,2 ,name : "百度" , href : "https://www.baidu.com/" , },name : "搜狗" , href : "https://www.sogou.com/" , },name : "360搜索" , href : "https://www.so.com/" , },name : "火狐" , href : "https://start.firefoxchina.cn/" , },"Title3" ,3 ,name : "百度" , href : "https://www.baidu.com/" , },name : "搜狗" , href : "https://www.sogou.com/" , },name : "360搜索" , href : "https://www.so.com/" , },name : "火狐" , href : "https://start.firefoxchina.cn/" , },"Title4" ,4 ,name : "百度" , href : "https://www.baidu.com/" , },name : "搜狗" , href : "https://www.sogou.com/" , },name : "360搜索" , href : "https://www.so.com/" , },name : "火狐" , href : "https://start.firefoxchina.cn/" , },return ("titleContainer" >"leftPlaceHolder" ></div>"rightPlaceHolder" >(item, index ) => {return (export default Titles;
重难点分析 组件使用思想
1 2 3 4 5 6 7 8 9 titleInfo.map((item, index ) => {return (
注意 {}是需要用return()返回内容的,这里也可以用()=>()的ES6写法,默认省略return,自动返回括号内的内容。
通过传递props的方式修改通用组件<SubTitle />中的部分内容,实现组件的高度复用。
页面布局的小技巧:1 2 <div className ="leftPlaceHolder" ></div>className ="rightPlaceHolder" >
<div>进行空间分配,再在相应空间内进行布局。
SubTitle.js
1 2 3 4 5 6 7 8 9 10 11 12 13 14 15 16 17 18 19 20 21 22 23 24 25 26 27 28 29 30 31 32 33 34 35 36 37 38 39 40 41 42 43 44 45 46 47 48 49 50 51 52 53 54 55 56 57 58 59 60 61 62 63 64 65 66 67 68 69 70 71 72 73 74 75 76 77 import React, { Component } from 'react' ;import DropdownTitle from './DropdownTitle' import "../style/SubTitle.css" import store from '../store/index' ;class SubTitle extends Component constructor (props) {super (props);this .state = store.getState()this .storeChange = this .storeChange.bind(this )this .storeChange)this .handleMouseOver = this .handleMouseOver.bind(this )this .handleMouseOut = this .handleMouseOut.bind(this )const action = {"open_isActive_delay" ,this .props.index,const delayAction = () => (dispatch, getState) => {"close_isActive_delay" }) }, 300 )this .state.isActive)"add_timer" , timer })this .setState(store.getState())return ("subTitleContainer" >"textFont" this .handleMouseOver()this .handleMouseOut()this .state.isActive ?this .state.id === this .props.index) ?{ color: "#44DAFF" } : { color: "#666666" })"white" }this .props.titleText}</a>this .props.params}this .props.index}
重难点分析 Redux-thunk const action = {type:"...",...}只能传递对象,无法加入 setTimeout() 异步函数,因此我们又需要引入中间件Redux-thunk。thunk 中间件主要处理一些状态的异步操作问题:例如 setTimeout 延时, axios 请求等。thunk 的基础和原理在这里不过多的介绍,可以参考: redux-thunk最简单的讲解,7行代码用就完事了 执行同步action:
1 2 3 4 5 6 7 8 9 function decrement (return { type : 'INCREMENT' , payload : 1 }(dispatch ) => {return {() =>type : 'INCREMENT' , payload : 1 }),() =>
执行异步action:
1 2 3 4 5 const delayAction = () => (dispatch , getState ) => {let timer = setTimeout(() => { dispatch({ type : "close_isActive_delay" }) }, 300 )type : "add_timer" , timer })Action() )
注意事项
在什么场景下需要用到redux的middleware,thunk?
1 (dispatch, getState) => {}
thunk 可以通过 getState 方法获取 store 仓库中的所有状态,并可以在执行完自定义函数操作后将结果 dispatch 到 store 仓库中。
理解redux-thunk 技术胖-Redux-thunk
安装 redux-thunk
配置 redux-thunk1 2 3 4 5 6 import { createStore , applyMiddleware } from 'redux' import thunk from 'redux-thunk' const store = createStore( reducer, applyMiddleware(thunk))
使用 thunk1 2 3 4 5 const func1 = () =>setTimeout (() =>"close_isActive_delay" }) }, 300 )"add_timer" , timer })
thunk 函数 ,thunk 函数接收两个参数,并在内部写业务逻辑,得到的 action 对象通过 dispatch 注入,并最后将 thunk 函数通过 dispatch 注入到 store 中。这里有一个点需要注意:即为什么要在 thunk 函数外嵌套一层函数,而不是直接将 thunk 函数注入到 store 中?这是因为外层嵌套函数后可以传入一些自定义的参数,由于 thunk 函数接收的两个参数是固定的,因此就有必要嵌套一层函数使得 thunk 函数可以使用用户自定义的一些业务逻辑参数,例如const func1 = (myname) => (dispatch, getState) => {...}
注意store.dispatch(func1())中注入的是函数的调用而非函数名。
1 2 3 4 5 6 7 8 9 const func1 = (xxx) =>return (setTimeout (() =>"close_isActive_delay" }) }, 300 )"add_timer" , timer })
1 2 3 4 5 6 7 8 9 10 11 12 13 14 15 16 17 18 19 20 21 22 23 24 25 26 27 28 29 30 31 32 33 34 35 36 37 38 39 40 41 42 43 44 import React, { Component } from 'react' ;import { createPortal } from 'react-dom' import "../style/DropdownMenu.css" import { CSSTransition } from 'react-transition-group' import store from '../store/index' class DropdownMenu extends Component constructor (props )super (props);this .state = {}const dom = window .documentthis .node = dom.createElement("div" )this .node)componentWillUnmount (window .document.body.removeChild(this .node)render (return createPortal(("menuContainer" in ={this .props.isActive}200 }"menuEnter" ,"menuEnterActive" ,"menuEnterDone" ,"menuExit" ,"menuExitActive" ,"menuExitDone" ,"dropDownMenu" ></div>this .node);export default DropdownMenu;
重难点分析 主要实践了 React-Portal,其实这里可以用脱离文档流加定位的方式实现,只是单纯的为练习而使用,React-Portal 具体使用可以参考先前的文章。
页面滚动动画 PageOneText.js 1 2 3 4 5 6 7 8 9 10 11 12 13 14 15 16 17 18 19 20 21 22 23 24 25 26 27 28 29 30 31 32 33 34 35 36 37 38 39 40 41 42 43 44 45 46 47 48 49 50 51 52 53 54 55 56 57 58 59 60 61 62 63 64 65 66 import React, { Component } from 'react' import "../../style/page1/PageOne.css" import { Typography } from 'antd' ;import store from '../../store' ; import "../../style/page1/PageOne.css" import testImg from '../../images/testImg.jpg' const { Title } = Typography;const { Paragraph } = Typography;class PageOneText extends Component constructor (props )super (props);this .state = store.getState()this .storeChange = this .storeChange.bind(this )this .storeChange)handleScroll (if (document .documentElement.scrollTop > 900 ) {const action = {"handle_scroll" ,if (document .documentElement.scrollTop < 550 ) {const action = {"handle_noscroll" ,storeChange (this .setState(store.getState())componentDidMount (window .onscroll = () => { this .handleScroll() }render (return ("textContainer" >`${this .state.pgoneClassNames.img} ` } src={testImg} alt="" />`title ${this .state.pgoneClassNames.title} ` }>{this .props.title}</Title>rows : 5 , expandable : true , symbol : 'more' }}`texts paragraph ${this .state.pgoneClassNames.text} ` }this .props.text}export default PageOneText;
重难点分析 页面滚动事件
处理页面滚动的函数1 2 3 4 5 6 7 8 9 10 11 12 13 14 15 handleScroll () if (document.documentElement .scrollTop > 900 ) {"handle_scroll" ,if (document.documentElement .scrollTop < 550 ) {"handle_noscroll" ,
document.documentElement 返回document文档的根节点元素,例如HTML文档则返回<html>元素节点。document.documentElement.scrollTop可以获得HTML文档滚动条距离其顶部的高度,由于显示分辨率的不同,scrollTop也不同,具体调试滚动阈值的时候可以通过console.log(document.documentElement.scrollTop)来实时打印确定。
题外话:document.documentElement和document.body区别
挂载监听事件1 2 3 4 componentDidMount (window .onscroll = () => { this .handleScroll() }
handleScroll()只定义了监听事件的处理函数,我们还需要在合适的位置将监听函数挂载。通常用window.onScroll 为当前页面的页面滚动事件添加事件处理函数。componentDidMount中,在页面组件渲染完成后挂载监听事件,当用户滚动页面时会不断触发监听事件所添加的事件处理函数handleScroll,当滚动距离超过阈值时,执行动画操作。
PageOne.js 用于包裹<PageOneText />组件。
1 2 3 4 5 6 7 8 9 10 11 12 13 14 15 16 17 18 19 20 21 22 23 24 25 26 27 28 29 30 31 32 33 34 35 36 37 38 39 40 41 42 43 44 45 46 47 48 49 50 51 52 53 54 55 56 57 58 59 60 61 62 63 64 65 66 67 import React, { Component } from 'react' ;import "../../style/page1/PageOne.css" import PageOneText from './PageOneText' import testImg from '../../images/testImg.jpg' import pgoneBackground from '../../images/pgoneBackground.png' class PageOne extends Component constructor (props )super (props);this .state = {}render (const itemList = ["h1. Title1" ,"XXXXXXXXXXXXXXXXXXXXXXXXXXXXXX\ XXXXXXXXXXXXXXXXXXXXXXXXXXXXXXXX\ XXXXXXXXXXXXXXXXXXxxxxxxxxxxxxxxx\ xxxxxxxxxxxxxxxxxxxxxxxxxxxxxxxxx\ xxxxxxxxxxxxxxxxxxxxxxxxxxxxxxxxxxxxx" ,"h2. Title2" ,"XXXXXXXXXXXXXXXXXXXXXXXXXXXXXX\ XXXXXXXXXXXXXXXXXXXXXXXXXXXXXXXX\ XXXXXXXXXXXXXXXXXXxxxxxxxxxxxxxxx\ xxxxxxxxxxxxxxxxxxxxxxxxxxxxxxxxx\ xxxxxxxxxxxxxxxxxxxxxxxxxxxxxxxxxxxxx" ,"h3. Title3" ,"XXXXXXXXXXXXXXXXXXXXXXXXXXXXXX\ XXXXXXXXXXXXXXXXXXXXXXXXXXXXXXXX\ XXXXXXXXXXXXXXXXXXxxxxxxxxxxxxxxx\ xxxxxxxxxxxxxxxxxxxxxxxxxxxxxxxxx\ xxxxxxxxxxxxxxxxxxxxxxxxxxxxxxxxxxxxx" ,return ("pgOnePlaceholder" >1 ,"100%" ,"100%" ,"absolute" , "" />(item, index ) => (export default PageOne;
CSS 动画 关于 CSS 动画,这里单独拿出一块来讲,因为这块踩的坑比较多。react-transition-group ,但是由于教程比较少,一些问题得不到解决,所以后面改用了 CSS 的 keyframe 帧动画。
CSSTransition react-transition-group CSSTransition
安装 react-transition-group1 npm install --save react-transition-group
配置 react-transition-group1 import { CSSTransition } from 'react-transition-group '
使用 CSSTransition<CSSTransition></ CSSTransition>标签包裹需要动画的组件(只能是一个整体,即多个子组件需要用<div>包裹)1 2 3 4 5 6 7 8 9 <CSSTransition in ={} classNames ={} timeout ={200} onEnter ={(el) => (...)}<subComponent /> </ CSSTransition >
<CSSTransition> 标签参数参考官方文档,必要的参数为in, classNames, timeout,in 参数接收 true/false,表示动画执行的条件;classNames 参数设定动画的CSS样式;timeout 设定动画执行时间。1 2 3 4 5 6 7 8 9 classNames = {{"xx" ,"xxx" ,"xxxx" ,
1 2 3 4 5 classNames = "xx"
使用CSSTransition的一些坑 无法设置目标的初始状态,例如一些淡入淡出的效果,目标未进行动画的时候理论上应该隐藏在用户视野之外。但在使用CSSTransition动画时,若设置目标 opacity:0,则无法播放动画效果。可能原因: <CSSTransition>已经挂载,后续的CSS样式遮盖了动画效果。目前没有什么比较好的解决方法。此外,目标组件内容若是接收传递的props,也会出现上述问题。因此,在PageOne 页面制作的时候,采用了 keyframe 帧动画。
CSS Keyframes 参考链接:CSS动画
定义关键帧 @keyframes 关键帧名称 {}0%, 100% 代表关键帧位置;opacity 表示透明度,transform 表示相对于目标初始位置的位移。
1 2 3 4 5 6 7 8 9 10 11 12 13 14 15 16 17 18 19 20 21 @keyframes leftToRight {opacity : 0 ;transform :translateX (-100% );opacity : 1 ;transform :translateX (0 );@keyframes topToBottom {opacity : 0 ;transform :translateY (-100% );opacity : 1 ;transform :translateY (0 );
定义animation动画 CSS3 animation animation: name duration timing-function delay iteration-count direction fill-mode;包含以下几个参数:
name: keyframes 的动画样式名称
duration: 动画时长
timing-function: ease-in 快进慢出;ease-out 慢进快出;ease-in-out;…
delay:动画延迟,等待n秒后开始动画 animation-delay
iteration-count:循环播放次数
direction:方向
fill-mode:规定动画在播放之前或之后,其动画效果是否可见。 none | forwards | backwards | both ; CSS3 animation-fill-mode
其中 animation-fill-mode 是解决动画目标初始化的关键,当 animation-fill-mode 设定为 both 时,以上述代码为例,动画播放前,目标元素动画效果可见,其为opacity:0; transform:translateX(-100%),即隐藏,而动画播放结束后,目标元素动画效果将会停留在关键帧100%的地方,即显示。
1 2 3 4 5 6 7 8 9 10 11 .item_row {animation : leftToRight 1000ms both ease-out;.item_delay_row {animation : leftToRight 1000ms ease-out 100ms both;.item_column {animation : topToBottom 1500ms both ease-out;
定义触发动画的监听事件 监听事件由上述的页面滚动触发。首先我们需要设定一个充当占位的样式(可为空),此处visibility 设为hidden表示该元素不可见但仍保留其布局空间。当监听事件触发时,我们向className中添加相应动画的CSS样式,替换原有的占位样式即可。
1 2 3 .hidden {visibility : hidden;
1 2 3 4 5 6 7 8 <img className ={ `${this.state.pgoneClassNames.img }`} src ={testImg} alt ="" /> <Title className ={ `title ${this.state.pgoneClassNames.title }`}> {this.props.title}</Title > <Paragraph ellipsis= {{ rows: 5 , expandable: true , symbol: 'more' }} className={`texts paragraph ${this.state.pgoneClassNames.text}`} > {this.props.text} </Paragraph >
采用 CSS Keyframes 的另一个好处是能够将动画 CSS 样式和初始 CSS 样式分开,例如下述代码title ${xxx},用 ES6 模板字符串的方式,title 是固定的初始样式,${xxx}内可以传入动态的动画样式。
CSS 样式布局心得 调整CSS样式心得:
从网页打开F12,选择元素查看其className进行定位。
width,height 宽高100%(或百分比设置)针对的是上一级元素(父级元素),包裹应将其删除,或者将上级空白div设置宽高100%。